

A Minecraft pillager outpost is a Overworld structure inhabited by pillagers, built around a four-story watchtower with its loot chest on the top floor. This guide covers what you’ll find before you climb. Nearby, you may also spot up to four smaller structures, such as tents, target structures, log piles, and cages.
Your chest is worth the climb. Each one has a 50% chance to hold a crossbow and a 25% chance to hold two Sentry Armor Trim smithing templates. Keep your guard up, though, because in Java Edition pillagers can keep spawning around the outpost even while you’re inside the tower.
Key Takeaways
- Each pillager outpost chest has a 50% chance to hold a crossbow and a 25% chance to hold two Sentry Armor Trim smithing templates, so the climb to the top floor is worth your time.
- In Java Edition, pillagers can keep spawning around the outpost while you’re inside the watchtower, so you should plan your escape route before you open the chest on the top floor.
- Before you climb, scout the outpost from a distance, make sure your armor, health, and hunger bar are full, and pick a nearby hill or tree line you can retreat toward.
- Bedrock Edition players need version 1.20.30 or later to find pillager outposts in cherry groves, so update your game before you search that biome.
- If an iron golem cage or allay cage sits near the tower’s base, you should free its mob before you start climbing to get backup against the pillagers.
What Does a Pillager Outpost Look Like?
A pillager outpost is built around one watchtower that always generates, and up to four smaller structures can appear around it. The tower is the main landmark, rising four stories high, so you’ll climb past three floors before you reach the top.
From a distance, the tower is easy to spot because it stands taller than the land around it. Take your time on the way up. Each floor is a chance to check for pillagers before you move higher, and the staircase gives you a clear path back down if things get crowded.
The smaller structures are where the outpost gets more varied. You might find tents, target structures, log piles, or cages scattered on the ground. Tents are small shelters that give the outpost a camp feel. Target structures look like a practice range with targets set up in rows. Log piles are stacks of logs that can give you some cover on open ground, and cages hold a mob inside, which we’ll look at in a later section.
Not every outpost has all four extras. Some have a single tent beside the tower, while others have a whole cluster of different structures. Before you start climbing, look over the ground around the base so you know which spots offer cover and which leave you exposed.
Once you reach the top, the chest waits in the open air at the highest point of the tower. Reaching it is the reward for all that climbing, and it’s the best reason to explore the watchtower floor by floor.
Which Biomes Have Pillager Outposts?

Pillager outposts can generate in seven Overworld biomes: plains, desert, savanna, snowy plains, taiga, meadow, and cherry grove. Each one gives the outpost a slightly different look, so it helps to know what to scan for before you set out.
- Plains and meadow: Open grass lets you spot the watchtower from far away, so you can plan your approach early.
- Desert and savanna: Flat, dry ground makes the tower stand out against the sand or dry grass.
- Snowy plains and taiga: Snow and cold-climate trees can hide the smaller structures, so walk the edges slowly.
- Cherry grove: Pink blossom trees can make the tents and log piles harder to pick out at a glance.
Biome availability is not identical in both versions. Some biomes differ between Java and Bedrock, so an outpost you find in one edition may not appear in the same place in the other.
Bedrock Edition added cherry groves as a possible location in version 1.20.30. If you play an older Bedrock version, update the game before you search cherry groves, or you’ll be looking in a biome that can’t hold an outpost yet.
What Loot Can You Find in the Watchtower Chest?
The chest on the watchtower’s top floor holds a mix of ordinary supplies and a few special items. Everyday goods, such as food and arrows, fill many of the slots, so the climb pays off even when the rare finds don’t show up. The special items are where the real excitement lies.
- One crossbow: a 50% chance in each outpost chest
- Two Sentry Armor Trim smithing templates: a 25% chance in each outpost chest
The crossbow is a ranged weapon, so you can hit a pillager from across the base instead of waiting for it to reach you. Because both finds are based on chance, you may open a chest and see only supplies. That doesn’t mean you’re in the wrong place.
Sentry Armor Trim was added to the game with Minecraft 1.20 in 2023. A smithing template is an item you use at a smithing table, alongside a piece of armor and a material, to add a decorative trim to that armor. Each template is used up when you apply it, so two templates in one chest give you a real choice about which armor piece to upgrade first.
In Java Edition, the chest draws from six loot pools. Each pool is a separate group of possible items, so one opening can pull from several groups at once. That’s why two chests from different outposts rarely look exactly the same.
Before you open the chest, make sure your inventory has free slots. A full inventory means you’ll have to leave items behind, and the crossbow and templates are the first things you’ll want to grab.
Do Pillagers Keep Spawning Around the Tower?
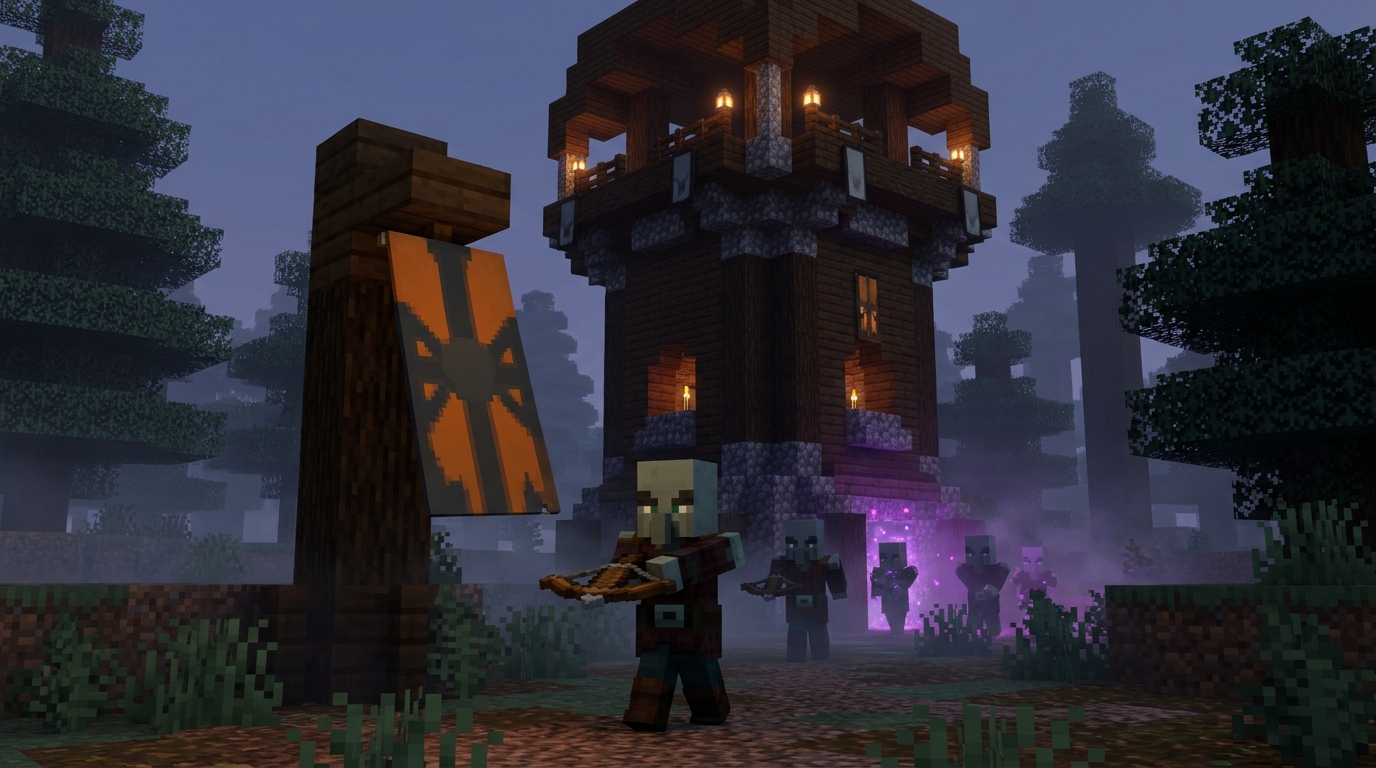
Yes. In Java Edition, pillagers can keep spawning in the outpost area while you’re inside the tower, so reaching the top doesn’t always end the encounter. You may climb the stairs and find new pillagers gathering at the base behind you.
That’s why it helps to plan both your route up and your way out before your first step. Look at the ground from every side of the tower and note which direction has the clearest path to a hill or a line of trees you can retreat toward. A route that looks safe at the bottom can get crowded fast once the pillagers start to gather.
Once you’re inside, keep an eye on the doorways and open edges on each floor. Pillagers can come up the stairs behind you, so don’t stand with your back to an opening you haven’t checked. If you have spare blocks, placing a few in a gap can buy you time to catch your breath and reload your crossbow.
Eat before you start climbing. Climbing and fighting drain your hunger bar, and it’s much easier to stay ready when your food and health are full before each floor.
The top floor is the hardest place to leave in a hurry. The chest sits in the open air at the highest point, so you’ll likely have to come back down the same staircase. Decide your escape route before you open the chest, not after the first pillager shows up.
Are the Iron Golem and Allay Cages Worth Opening?
Yes, both cages are worth opening, because each one frees a helper you can use right away. In Java Edition, an outpost iron golem cage holds one golem, and an allay cage holds two allays.
Cages are among the smaller structures that can appear near the tower, so you may spot one while you scan the ground before you climb. Look along the open edges of the base, where a cage stands out against grass or sand.
An iron golem is a big, sturdy fighter that attacks hostile mobs near it. A single golem can draw pillager attention away from you while you make your way to the staircase. Stay close to it, since it can take hits that would otherwise land on you.
Allays work differently. They don’t fight, but they fly to nearby items and carry them back to you. Two allays can save you from hunting scattered drops around the base after a skirmish, so they’re more of a helper than a shield.
If a cage sits near the tower’s base, free its mob before you start climbing. That gives you backup while you deal with the pillagers still gathering on the ground.
How Should You Approach the Tower Safely?

You can approach a pillager outpost safely by watching it from a distance, getting your gear ready, and planning both your climb and your way back down before you step onto the first stair.
Rushing in is the fastest way to get caught on open ground. Give yourself a few minutes to look at the base first. The tower is easy to see from far away, and the pillagers around it are easier to count from a safe spot.
Follow these steps in order each time you visit an outpost:
- Scout the area from a distance by standing on a hill or at the edge of a tree line and looking for the tower, the smaller structures, and any pillagers moving around the base.
- Check your armor and health before you move closer by making sure every armor piece is intact, your health bar is full, and your hunger bar is topped up.
- Look over the layout of the tower and nearby smaller structures by noting which tents, log piles, and cages sit close to the base and which spots give you cover on open ground.
- Keep a clear escape route in mind by choosing a hill, a line of trees, or a gap in the walls that you can run toward from the tower’s doorway.
- Use the tower’s four stories to plan your climb to the top chest by clearing each floor, checking its doorways and open edges, and moving up only once the floor below is quiet.
Pick your route before you need it. A path that looks short from the ground can feel much longer when a crossbow is in your hands and a pillager is closing in from the side. Walking the base once without going up the stairs gives you a feel for the distances.
Stay mindful on every floor, not just the first one. Each stair step puts you farther from the ground, so keep one eye on the staircase below you while you check the next level. If the path back looks blocked, stop climbing and reassess before you go any higher.
Planning Your Next Outpost Visit
Your next step depends on which edition you play. Open the game and check your version number on the title screen. Java and Bedrock don’t always place outposts in the same biomes, and if you play Bedrock, you’ll need version 1.20.30 or later to search for outposts in cherry groves.
Then pick one biome from the list and head there for your first search. Desert or savanna is a good starting point, because the flat, dry ground makes the watchtower easy to spot from far away. If you’d rather have open grass for scouting, try plains.
When you find an outpost, make your first visit a scouting trip. Walk the base once without climbing, count the pillagers you can see, and note where the iron golem or allay cages sit. Write down which smaller structures appeared and whether the chest held a crossbow or Sentry Armor Trim templates. After a few visits, you’ll start to notice patterns, and you’ll know which outposts are worth climbing and which are better left for a stronger character with a full set of gear.