Tired of mining for hours just to lose your favorite diamond pickaxe to a lava pool? You can stop relying on luck and start building a simple villager trading hall to get infinite enchanted books and gear. By keeping your villagers in organized cells with their own workstations, you turn a messy village into a professional shop where Mending books and diamond chestplates are always in stock.
Setting up your hall is easy once you master the basics of moving villagers with minecarts or boats. You just need to give each fletcher or librarian a small space to stand and a job block to reset their trades every day. This setup ensures you never run out of arrows or powerful enchantments, making your survival world much safer and more productive.
Key Takeaways
- Organizing villagers into 1×1 cells with specific workstations like Lecterns and Fletching Tables creates a reliable, infinite supply of enchanted books and diamond gear.
- Librarian trades can be manually refreshed by breaking and replacing a Lectern until high-level enchantments like Mending or Fortune III appear.
- Fletchers provide the most efficient path to wealth for beginners by allowing players to trade easily obtainable sticks for emeralds.
- Protecting trading halls with lighting and overhead slabs prevents mob interference, while curing zombie villagers on Hard difficulty secures permanent trade discounts.
Essential Workstations For Your Trading Hall
To get your villager trading hall up and running, your first priority should be crafting a few Lecterns to employ Librarians. These villagers are the most valuable because they offer enchanted books like Mending, Fortune III, and Sharpness V for just a few emeralds and a book. You can easily reset their trades by breaking and replacing the Lectern until you see the specific enchantment you want. This strategy allows you to skip the luck-based enchantment table entirely and gear up with the best tools in the game. It is a simple way to turn your basic survival gear into high-quality equipment without much effort.
Once you have your enchantments sorted, you will need a steady supply of emeralds to pay for them, which is where the Fletching Table comes in. Placing a Fletching Table near a villager turns them into a Fletcher, who will happily trade emeralds for common sticks. Since you can get stacks of sticks just by chopping down a few trees, this is the easiest way for beginners to get rich quickly. You no longer have to spend hours mining for rare ores when you can just trade wood from your backyard. This simple loop ensures you always have enough currency to buy whatever your Librarians are selling.
You might also want to consider a few secondary workstations like the Smithing Table or the Blast Furnace to round out your hall. Toolsmiths and Armorers can eventually trade you full sets of diamond gear, saving you the trouble of hunting for diamonds deep underground. These workstations are easy to craft with basic iron and wood, making them perfect for a starter setup. By focusing on these specific professions, you transform your group of villagers into a one-stop shop for everything you need. Your survival world becomes much easier when you have a dedicated row of professionals ready to trade at any time.
Designing Easy One Block Trading Cells

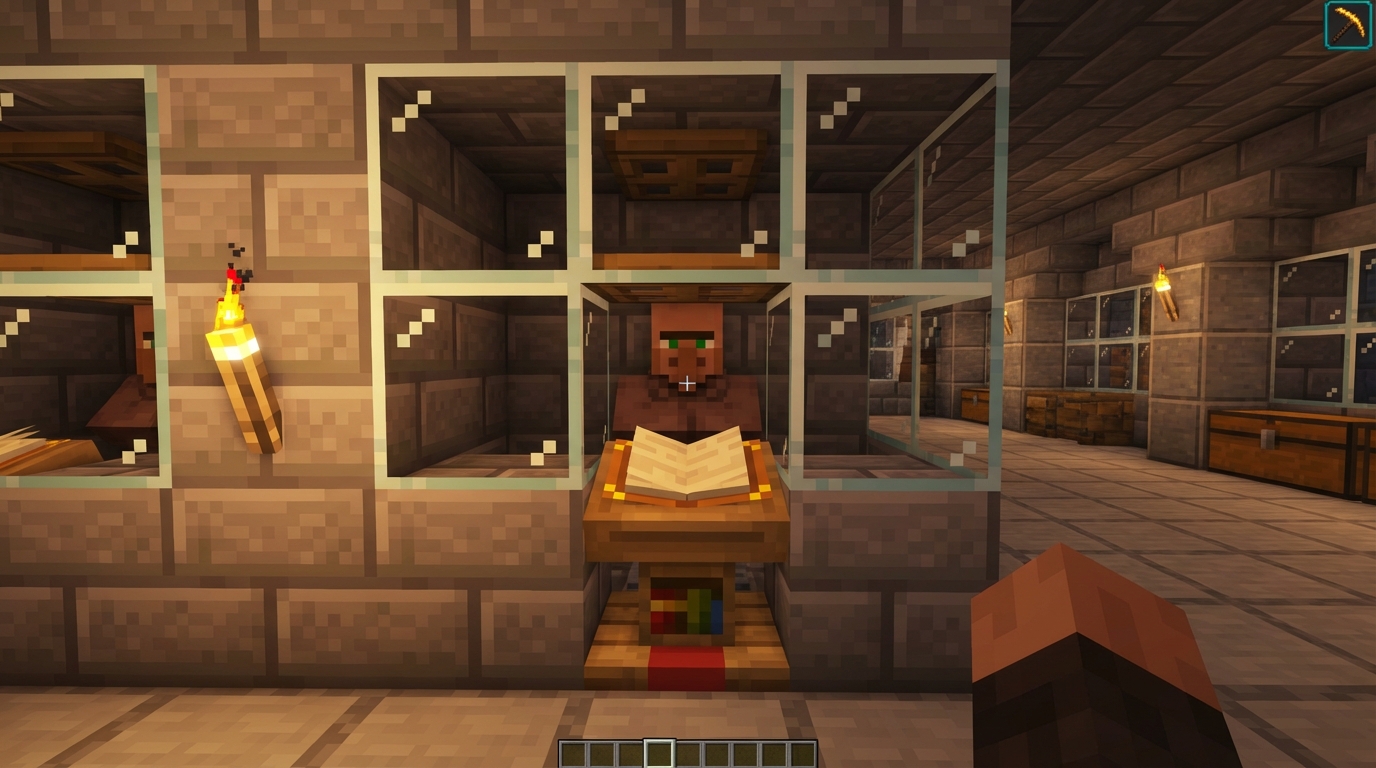
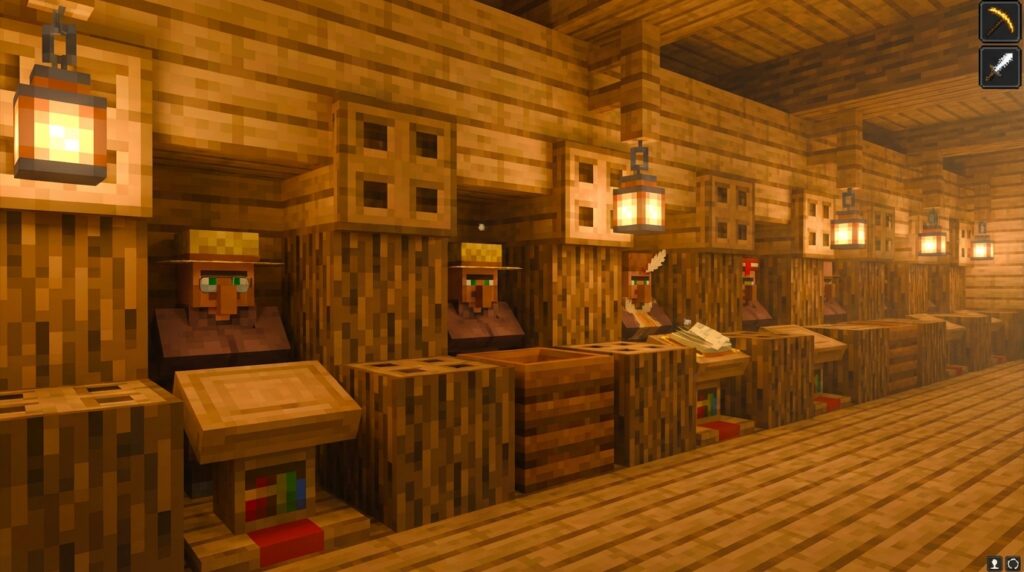
Creating a simple 1×1 trading cell is the best way to keep your villagers organized after they leave your breeder. You can build these stalls using basic materials like stone bricks, glass, or wood to match your base style. Each cell needs a solid block behind the villager and a workstation like a Lectern or Fletching Table directly in front of them. This setup prevents your traders from wandering off or getting mixed up while you are looking for that perfect Mending book. By keeping them in a single block space, you ensure they can always reach their workstation to restock their trades twice a day.
Safety is a huge priority when designing these stalls because a single zombie can ruin your entire trading hall. You should place a trapdoor or a slab on the top half of the opening above the workstation to prevent mobs from reaching inside. This gap is small enough that you can still easily click on the villager to open their trade menu, but it acts as a protective shield against unwanted visitors. Lighting up the area with torches or glowstone is another essential step to keep the interior of your hall completely spawn-proof. These small details make your survival world much smoother by protecting your hard-earned discounts and high-level enchants.
To make your trading hall even more efficient, try placing a bed behind the row of cells to help the villagers feel secure and potentially lower their stress levels. You can also use signs or item frames on the front of each cell to label exactly what each villager is selling. For example, placing a piece of paper in an item frame can help you quickly find your Librarian who sells Unbreaking III. This organized approach saves you a lot of time when you need to gear up for a big boss fight or a long mining trip. Building your stalls this way turns a messy group of villagers into a professional and easy-to-use resource hub.
Moving Villagers From Breeders To Stalls
Once your villager breeder is up and running, the next step is moving villagers into their permanent trading stalls without any hassle. The most reliable method for beginners is using a simple minecart track that leads directly from the breeder’s collection point to your hall. You can place a boat inside the collection area to catch baby villagers, then break the boat once they grow up to easily nudge them into a minecart. This prevents them from wandering off into caves or getting trapped in corners where they might be at risk from zombies. Using powered rails every few blocks ensures the minecart has enough speed to climb hills and reach the destination quickly.
If you want to save on iron and gold, you can use boats on flat ground to move your villagers over short distances. Boats are fantastic because they allow you to transport two villagers at once and they do not require any complex rail setups. You can lead them across grass or stone by simply hopping in and rowing, though keep in mind that boats move much faster on ice paths if you have silk touch. Once you arrive at the trading stall, just break the boat with a lead or your fist to drop the villager exactly where you want them. This hands-on approach keeps you in total control of their movement until they are safely tucked away.
After the villager is standing in their new 1×1 cell, immediately place a workstation like a lectern or fletching table to lock them in. It is helpful to have a temporary fence gate or a block at head height to keep them from jumping out while you are setting up their trades. If the villager picks up the wrong profession, simply break the workstation and place it down again until you see the specific enchanted book or item you need. By keeping your transport path clear of obstacles and having your workstations ready, you can fill a dozen stalls in just a few minutes. This organized system turns a chaotic group of villagers into a streamlined shop for all your survival needs.
Restocking Trades And Lowering Your Prices

To keep your trading hall running smoothly, you must ensure every villager can access their specific workstation. A villager needs to stand directly next to their block, such as a lectern for librarians or a fletching table for fletchers, to refresh their inventory. They will typically restock their items twice per game day, allowing you to keep buying those valuable enchanted books or diamond tools. If you notice a villager isn’t restocking, check to see if they are linked to a different workstation nearby instead of the one in their stall. Simply breaking and replacing the block usually fixes this pathfinding issue and gets them back to work.
Getting the best prices for your items is the secret to a truly efficient survival base. The most effective way to lower costs is by curing zombie villagers, which provides a permanent discount on all their trades. You can set up a safe area where a zombie can attack your villager, then use a Splash Potion of Weakness and a Golden Apple to turn them back. This process can be repeated until top-tier items like Mending books or Silk Touch pickaxes cost only a single emerald. Just make sure your game difficulty is set to Hard to guarantee the villager survives the transformation process every time. For even more resources, you can build an automatic raid farm to gain infinite totems and emeralds alongside your trading hall discounts.
Build Your Reliable One-Stop Shop
Building your first simple trading hall transforms the way you play Minecraft by turning a chaotic village into an organized resource hub. You no longer have to spend hours mining for diamonds when you can simply trade a few stacks of sticks for a shiny new chestplate. By giving each villager a dedicated cell and a workstation like a lectern or fletching table, you create a reliable shop that never moves. This setup ensures that your favorite Mending or Fortune III books are always exactly where you left them. It is the perfect follow-up to your villager breeder and marks the moment you truly master survival mode.
Now that your trading hall is functional, you can focus on maximizing your rewards through easy emerald trades. You can use fletchers to turn excess wood into emeralds or librarians to stock up on infinite enchanted books for your gear. Having a row of specialized traders means you will never run out of high tier tools, even if you lose your items in a lava pool. This simple build saves you time and effort, allowing you to spend more hours exploring and building instead of grinding for materials. Enjoy the convenience of your new infinite supply chain and the power of a fully geared character.
Frequently Asked Questions
1. How do you get a specific enchanted book like Mending?
Place a Lectern in front of a jobless villager to turn them into a Librarian and check their first trade. If they do not offer Mending, break the Lectern and place it down again to refresh their trades until the book appears.
2. What is the easiest way to get emeralds for trades?
Craft a Fletching Table and place it near a villager to turn them into a Fletcher. You can then chop down trees to craft sticks and trade those sticks directly for emeralds, which is much faster than mining for ores.
3. How do you move villagers into their trading cells?
The most reliable way to transport villagers is by using minecarts on rails or placing them in boats. Once you get them into their small designated space, you can break the vehicle and place their workstation to lock them in place.
4. Why do my villagers stop trading after a while?
Villagers need to work at their specific workstation to restock their items up to twice per day. Make sure each villager can easily reach the job block directly in front of them so they can refresh their inventory.
5. Can you get diamond gear from a trading hall?
Yes, you can get full diamond armor and tools by using Armorers, Toolsmiths, and Weaponsmiths. Once you level these villagers up by trading with them, they will offer powerful diamond items that save you from ever needing to mine diamonds again.
6. Do villagers need beds in a trading hall?
In the Java Edition of the game, villagers do not need beds to restock their trades as long as they have access to their workstation. This allows you to keep your hall design very compact and simple since you only need to provide a small standing area and a job block.

